Introduction
You’ve built your WooCommerce store. You’ve added your products. But now you’re staring at the payments section, wondering how to actually get paid.
It’s one of those moments that feels more complicated than it should be. You just want customers to click “buy” and have the money land in your account. Simple, right?
Here’s the thing: setting up WooCommerce Payments doesn’t have to be confusing. In this guide, we’ll walk through exactly how to get it running on your store step by step, in plain English. No tech jargon, no confusion.
By the end, you’ll know how to set up payments, what to watch out for, and how to make sure everything works smoothly from day one.
Why Payment Setup Matters More Than You Think
Let’s be honest. If customers can’t pay you easily, they won’t buy from you.
According to the Baymard Institute, nearly 18% of online shoppers abandon their carts because the checkout process is too complicated or confusing. That’s almost one in five potential sales walking away.
Payment setup isn’t just a technical checkbox. It’s the bridge between browsing and buying. When it works well, customers don’t even notice it. When it doesn’t? They leave, and they probably won’t come back.
A smooth payment process builds trust. It shows professionalism. And it directly impacts your bottom line. Whether you’re selling handmade candles or digital courses, getting this right from the start saves you headaches later.
Plus, different payment methods matter to different customers. Some want to use credit cards. Others prefer digital wallets like Apple Pay or Google Pay. The more options you offer, the more sales you’ll capture.
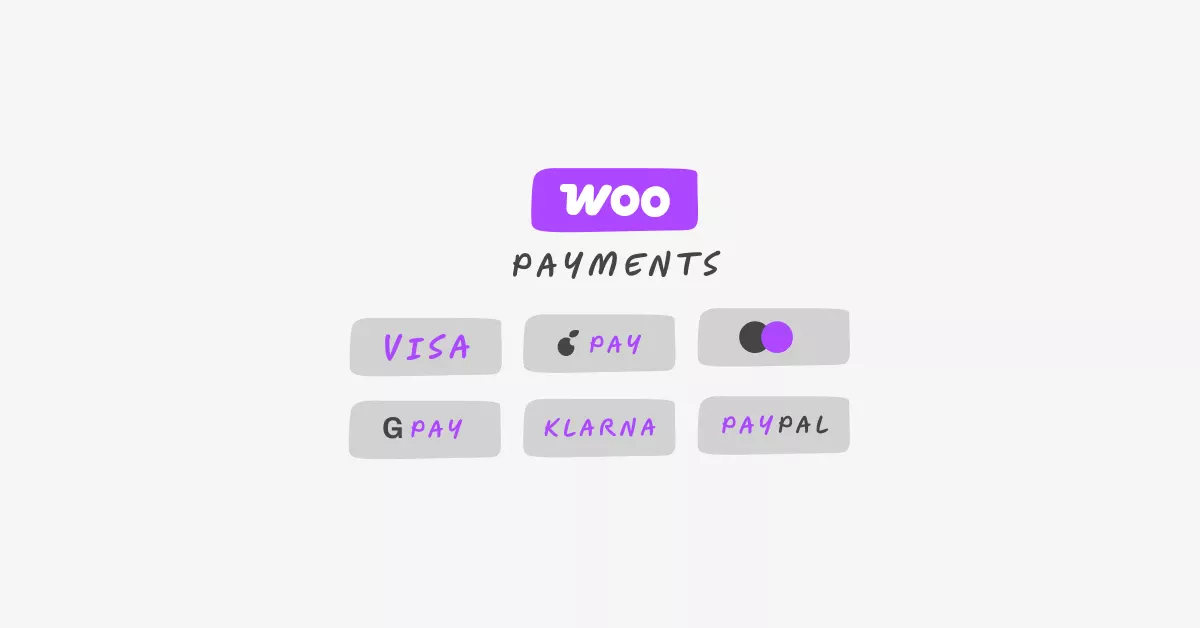
What Is WooCommerce Payments?
WooCommerce Payments is the official payment solution built specifically for WooCommerce stores. It’s made by Automattic, the same team behind WordPress and WooCommerce.
Why Choose WooCommerce Payments?
Here’s what makes it stand out:
- Everything in one place: Manage payments directly from your WordPress dashboard. No jumping between different platforms.
- No monthly fees: You only pay a percentage per transaction. There’s no recurring subscription cost.
- Fast deposits: Money typically reaches your bank account within 2 business days in most countries.
- Built-in dispute management: Handle chargebacks and customer disputes right inside WooCommerce.
- Multiple payment methods: Accept credit cards, debit cards, Apple Pay, Google Pay, and more.
How It Compares to Other Options
You might be wondering: what about PayPal or Stripe?
Those are solid options too. But WooCommerce Payments keeps everything native to your WordPress site. You don’t need separate accounts or extra plugins. Updates happen automatically. And support comes from the WooCommerce team.
Think of it like this: you could buy a third-party phone charger, or you could use the one made by your phone’s manufacturer. Both work, but one’s designed specifically for your device.
Real-World Examples and Use Cases
Let’s look at how different stores use WooCommerce Payments:
Example 1: Sarah’s Handmade Jewelry Store
Sarah sells custom bracelets and necklaces. She used to rely only on PayPal, but noticed customers dropping off at checkout. After adding WooCommerce Payments with Apple Pay, her mobile conversions increased by 23%. Why? Because iPhone users could check out with one tap instead of typing card details on a small screen.
Example 2: Mike’s Online Course Platform
Mike sells digital marketing courses ranging from $49 to $299. He needed a payment system that worked internationally. WooCommerce Payments allowed him to accept payments in multiple currencies without separate merchant accounts. Students in Europe pay in euros, while US customers pay in dollars all processed seamlessly.
Example 3: The Local Coffee Roastery
A small coffee shop expanded online during the pandemic. They needed something simple because the owner wasn’t tech-savvy. WooCommerce Payments let them start accepting orders in under 30 minutes. No coding, no complicated setup. Just straightforward payment processing that worked from day one.
The common thread? These store owners needed something reliable, easy to manage, and customer-friendly. WooCommerce Payments delivered on all three.
Step-by-Step Guide: Setting Up WooCommerce Payments
Ready to get started? Here’s exactly how to set it up:
Step 1: Check Your Eligibility
WooCommerce Payments is available in specific countries. Before you begin, make sure your business is located in a supported region. As of now, it works in the United States, Canada, Australia, New Zealand, the UK, and several European countries.
Visit the official WooCommerce Payments page to confirm your country is supported.
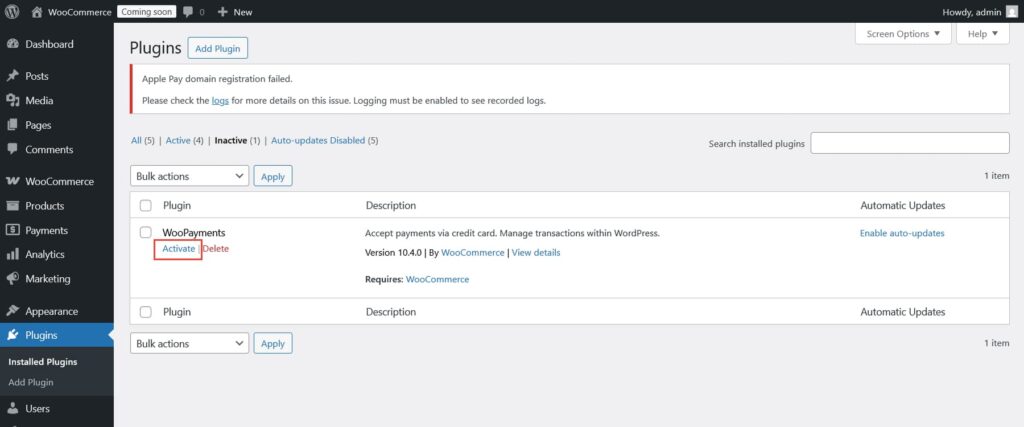
Step 2: Install and Activate the Plugin
Log into your WordPress dashboard. Go to Plugins > Add New. Search for “WooCommerce Payments” in the search bar. Click Install Now, then click Activate.
Step 3: Create Your Account
The setup wizard will ask for basic business information:
- Business name and type
- Business address
- Your contact email
- Bank account details for deposits
This information is required for compliance and security. WooCommerce uses Stripe as its payment processor behind the scenes, so your data is protected with bank-level encryption.
Take your time filling this out accurately. Mistakes here can delay your first payout.
Step 4: Verify Your Identity
You’ll need to provide some documents to verify your business. This usually includes:
- A government-issued ID
- Proof of business address (like a utility bill)
- Tax identification number
This step prevents fraud and ensures you’re a legitimate business. It’s standard for any payment processor.
Verification typically takes 1-2 business days, though it can be faster.
Step 5: Configure Your Payment Settings
Once approved, go to WooCommerce > Settings > Payments. You’ll see WooCommerce Payments listed.
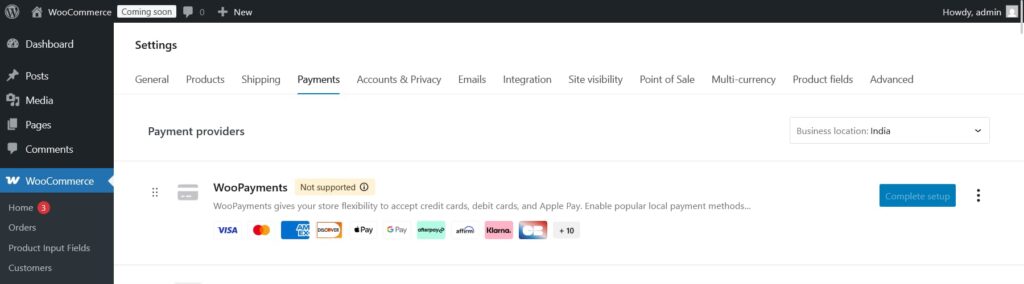
Click Manage to customize your settings:
- Enable test mode: Turn this on to test transactions without real money
- Choose payment methods: Enable credit cards, Apple Pay, Google Pay, etc.
- Set your statement descriptor: This is what appears on customers’ bank statements
- Configure deposits: Choose how often you want payouts (daily, weekly, or monthly)
Make sure your statement descriptor is clear. Use your business name so customers recognize the charge and don’t dispute it.
Step 6: Test Your Checkout
Before going live, run a test purchase. Use WooCommerce Payments test mode and a test card number (you can find these in the WooCommerce documentation).
Go through the entire checkout process as a customer would. Make sure everything flows smoothly.
Step 7: Go Live
Once testing looks good, disable test mode. Your store is now ready to accept real payments.
Congratulations! You’ve successfully set up WooCommerce Payments.
Pro tip: If you want to optimize your checkout even further, consider adding the Quick Buy Now Button for WooCommerce. It lets customers skip the cart entirely and jump straight to checkout, perfect for reducing friction and boosting impulse purchases.
Common Questions and Answers
WooCommerce Payments charges 2.9% + $0.30 per transaction for US-based stores using domestic cards. International cards have slightly higher fees. There are no monthly fees or setup costs.
No problem. You can run multiple payment gateways simultaneously. Some store owners offer both WooCommerce Payments and PayPal to give customers more options.
Deposits typically arrive in your bank account within 2 business days after a purchase. Your first payout might take up to 7-14 days as part of the initial verification process..
Yes. WooCommerce Payments supports multiple currencies and international cards. Just make sure you’ve enabled the currencies you want to accept in your settings.
Conclusion
Setting up WooCommerce Payments is simpler than most store owners expect. You don’t need technical skills. You don’t need to hire a developer. Just follow the steps, verify your information, and you’re ready to start accepting payments.
The key is getting it right from the beginning. A smooth payment process means more completed sales, happier customers, and fewer headaches down the road.
Remember: your checkout is the final step between browsing and buying. Make it as easy as possible, and watch your conversion rates improve.
Ready to start accepting payments with confidence?
Set up WooCommerce Payments today with their built-in support and secure processing. And if you want to make your checkout even faster, try the Quick Buy Now Button for WooCommerce with a 14-day money-back guarantee. No risk, fully supported, no coding needed.
One final tip: keep an eye on your payment analytics inside WooCommerce. You’ll see which payment methods customers prefer, which can help you optimize even further.
Your store is ready. Your payments are set. Now go make some sales.